Last Updated on November 17, 2025 by shawnshealth
Start your fitness journey with this 10-step low-impact calisthenics plan for beginners. Perfect for building strength without stressing your joints!
Introduction to Calisthenics Plan for Beginners
Are you searching for the perfect calisthenics plan for beginners to boost your fitness without putting too much strain on your body? Low-impact calisthenics might be exactly what you need. These exercises focus on smooth, controlled movements that build strength, flexibility, and endurance while being gentle on your joints. Whether you’re just starting your fitness journey or looking for a safe way to stay active, this calisthenics plan for beginners is designed to help you succeed.
This 10-step approach is simple, effective, and easy to adapt to your needs. Ready to begin? Let’s dive in!
📘 New to calisthenics and want the full picture? Before diving into this beginner-friendly plan, check out The Ultimate Guide to Calisthenics—your complete resource for mastering bodyweight training. Learn the fundamentals, benefits, and progressions that make calisthenics a powerful tool for strength, mobility, and confidence.
## What Is Low-Impact Calisthenics?
- Bodyweight exercises designed to be easy on the joints
- Focuses on controlled, gentle movements
- Builds strength, flexibility, and endurance without harsh impact
- Ideal for beginners, seniors, or anyone recovering from injuries
## Why Choose Low-Impact Calisthenics as a Beginner?
- Reduces the risk of injury compared to high-impact workouts
- Strengthens muscles while protecting joints
- Improves balance, mobility, and core stability
- Helps create a sustainable, long-term fitness habit
## What Are the Best Low-Impact Calisthenics Exercises for Beginners?
- Wall push-ups for building upper body strength
- Assisted squats to strengthen legs safely
- Modified planks to improve core stability
- Standing knee raises to boost balance and endurance
Table of Contents

As an Amazon Associate, I earn from qualifying purchases. This means I may receive a commission if you purchase through links on this site, at no extra cost to you.
Always consult your doctor before starting any new exercise program. The author is not responsible for injuries or health issues arising from the use of this information.
Author’s Note: My Take
While this article aims to help you progress in your workouts without injury, it doesn’t mean you can’t challenge yourself and progress. By gradually progressing through different exercise variations, like moving from wall push-ups to kitchen counter push-ups, you can continuously increase the difficulty. Over time, you’ll be able to work up to full push-ups, decline push-ups, and more advanced movements like the Planché push-up or one-arm push-up. Of course, this principle of progression applies to any exercise, not just push-ups.
The key is to adjust the difficulty as you get stronger, whether by changing positions, using resistance bands, or altering the angle of your body. This approach not only helps avoid injury but also ensures consistent progress without overloading your body, unlike the “no pain, no gain” mentality that often leads to setbacks from overtraining or injury. Be patient, stay consistent, and you’ll see lasting benefits.
Check out this video from Project Body-Fit 7 comparing High vs Low Impact!
Why Choose a Low-Impact Calisthenics Plan?
Low-impact calisthenics focuses on movements that minimize stress on your joints. This makes it a great choice for beginners, seniors, or anyone recovering from an injury. Here’s why it’s worth trying:
- Gentle on Joints: Perfect for those with arthritis or joint pain.
- Accessible: No gym membership required. These exercises can be done at home.
- Builds Strength Safely: Develops functional strength using your own body weight.
- Adaptable: Easily scaled up as you gain strength and confidence.

The 10-Step Low-Impact Calisthenics Plan
1. Warm-Up (5-10 Minutes)
Start with a gentle warm-up to prepare your muscles and reduce the risk of injury. Focus on dynamic stretches and light cardio.
- Exercises: Arm circles, leg swings, and marching in place.
- Tip: Move at a comfortable pace to get your heart rate up.
2. Wall Push-Ups (3 Sets of 10-12 Reps)
A great way to build upper body strength without overloading your joints.
- How to Perform: Stand an arm’s length from a wall, place your hands shoulder-width apart, using your arms lower yourself to the wall (you can touch nose or chin to wall). Push your body away from the wall while keeping your core engaged. During the “down” movement allow your shoulder blades to come together, allowing shoulders to move back. Keep shoulders pulled down toward the floor (toward your waist) throughout the movement. Do not shrug.
- Progression: Move to incline push-ups on a sturdy surface.
🧱Wall Push-Ups for Beginners | How To –
– This video clearly demonstrates proper wall push-up form, making it ideal for beginners and seniors looking to build upper body strength safely
3. Assisted Squats (3 Sets of 10-12 Reps)
This beginner-friendly version of squats strengthens your lower body.
- How to Perform: Stand with feet approximately shoulder width apart. Bend at the knees while allowing your butt to move backward, as if about to sit down in a chair, then push back up to the standing position. Use a chair, wall, or any solid object to hold onto as needed.
- Tip: Keep your weight on your heels and your back straight. Keep eyes facing forward.
- Note on the image: the only difference between a full squat and an assisted squat is the use of an object for additional balance and support.
🦵This beginner-friendly version of squats strengthens your lower body while minimizing joint strain. Use a chair, wall, or sturdy object for support as you lower into a squat and return to standing. Focus on keeping your weight in your heels, back straight, and eyes forward.
👉 Watch an Assisted Squat Tutorial for Beginners – Learn proper form, safety tips, and how to use support effectively to build strength with confidence.

4. Standing Leg Raises (3 Sets of 10 Reps per Leg)
Improves balance and strengthens your core and hips.
- How to Perform: Stand up straight, lift one leg (keeping your working leg straight) to the front, side, and/or back, and hold for a second, repeat. Keep the working leg stationary at the knee. You may really feel this in the hips and core.
- Modification: Use a wall or chair for balance.
- Tip: These don’t have to be high. start with foot a few inches off the floor then gradually go higher as your ability improves.
For a Standing Leg Raise Demonstration click here.
🦵 Standing leg raises improve hip mobility, core strength, and balance—all without equipment. This gentle movement is perfect for beginners and seniors. You can lift the leg to the front, side, or back, using a wall or chair for support. Start low and increase range as your strength improves.
👉 Watch a Standing Leg Raise Tutorial – This video offers a clear demonstration of proper form and technique using just your body weight
5. Modified Plank Hold (3 Rounds of 15-30 Seconds)
Strengthen your core with this low-impact variation.
- How to Perform: Start on your knees and forearms, keeping your back straight. Hold this position without letting your hips sag.
- Progression: Transition to a full plank when ready.
Check here For a Tutorial of Performing Plank Holds
🧘 Plank holds are one of the most effective core exercises for beginners. They strengthen your abs, back, and shoulders while improving posture and stability. Start with a modified plank on your knees or forearms, and progress gradually to full planks as your strength improves.
👉 Watch a Plank Hold Tutorial for Beginners – This video from Bowflex® demonstrates proper form and technique for safe, effective plank holds.

6. Step Touches (3 Sets of 20 Steps)
A simple cardio movement to keep your heart rate up and to work on lateral movement.
- How to Perform: Feet together. Step to the side with your right (you can start with either foot), then bring your left foot to touch the right. Then, step out with your left, bringing your right foot in to touch the left.
- Tip: Add arm movements to engage your upper body.
👣 Step touches are a simple yet effective way to boost your heart rate, improve coordination, and add gentle lateral movement to your routine. This beginner-friendly cardio move can be done at home with no equipment. Add arm swings or light resistance for extra challenge.
👉 Watch a Step Touch Tutorial for Beginners – This video breaks down the basic step touch technique and shows how to use it as a foundation for other movements.
7. Wall Sits (3 Sets of 15-30 Seconds)
Strengthen your quads and glutes with this static exercise.
- How to Perform: Stand against a wall, lower your body until your thighs are parallel to the floor, and hold.
- Progression: Increase the hold time as you gain endurance.
🧱 Wall sits are a powerful isometric exercise that strengthens your thighs, glutes, and core without movement. Simply slide down a wall until your knees are at a 90° angle and hold the position. Keep your back flat, shoulders relaxed, and weight evenly distributed through your feet.
👉 Watch a Wall Sit Tutorial for Beginners – This video clearly demonstrates proper form, how long to hold, and tips for safe execution.
8. Seated Shoulder Press with Resistance Band (3 Sets of 10 Reps)
Build shoulder strength with controlled resistance. Even though we are primarily concerned with calisthenics in this article a hybrid of calisthenics and weight/resistance bands can be very effective.
Note that this is not specific to calisthenics but is a good addition for deltoids/shoulders.
- How to Perform: Sit on a chair, hold a resistance band under your feet, and press your arms overhead.
- Alternate: Use light dumbbells or water bottles.
Instructional Video on Seated Shoulder Press with Resistance Band (also works with dumbbells)
💪 The seated shoulder press strengthens your deltoids, triceps, and upper chest using resistance bands or light dumbbells. This movement is ideal for beginners and seniors looking to build upper body strength safely. Sit tall, engage your core, and press overhead with control—whether using bands anchored under your feet or handheld weights.
👉 Watch a Seated Shoulder Press Tutorial for Beginners – This video demonstrates proper form using resistance bands and highlights key muscle groups worked
🛒 Looking for a compact, all-in-one strength solution? 👉 Shop adjustable dumbbells on Amazon
– These space-saving weights offer multiple resistance levels in one sleek set, making them perfect for home workouts. Whether you’re doing presses, rows, or curls, they’re like having an entire gym in a single piece of equipment.

9. Bird Dog Exercise (3 Sets of 10 Reps per Side)
Improves balance and core stability.
- How to Perform: Start on your hands and knees. Extend one arm and the opposite leg, then return to the starting position.
- Tip: Keep movements slow and controlled.
10. Cool-Down (5-10 Minutes)
End with static stretches to relax your muscles and improve flexibility.
- Exercises: Hamstring stretch seated forward fold, and cat-cow stretch.
- Tip: Breathe deeply to enhance relaxation.
Note: Gym classes everywhere had us stretching before working out. A good word picture for this is trying to stretch a rubber band after taking it out of the freezer. It makes no sense! Warm up before working out, do stretches after working out.
🧘 Cooling down after your workout helps reduce muscle soreness, improve flexibility, and promote recovery. A proper cool-down routine includes gentle stretches and deep breathing to relax your body and mind. Focus on slow, controlled movements and hold each stretch for 20–30 seconds.
👉 Watch a Full Body Cool-Down Stretch Tutorial – This 5-minute video guides you through a recovery-focused cool-down with stretches for shoulders, chest, hips, and legs.
✅ Beginner Calisthenics Checklist
Use this quick reference to track your progress or build your own routine:
- [ ] Warm-Up
- [ ] Wall Push-Ups
- [ ] Assisted Squats
- [ ] Standing Leg Raises
- [ ] Modified Plank Hold
- [ ] Step Touches
- [ ] Wall Sits
- [ ] Seated Shoulder Press
- [ ] Bird Dog Exercise
- [ ] Cool-Down
Pull-Ups:
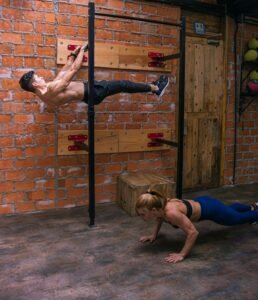
I did not address pull-ups specifically in this article because they can sometimes seem daunting for a beginner. They are an important part of any calisthenics regimen but starting out with Australian Rows, standing rows, etc. is a great way to get started but for the absolute beginner may even be on the more challenging side.
🧗 Pull-ups can feel intimidating at first, but there are many beginner-friendly variations that make them accessible to everyone. Whether you’re starting with rows, band-assisted pull-ups, or wall-supported movements, there’s a progression that fits your current strength level.
👉 Check out my article on Different Types of Pull-Ups – Learn how to build up to full pull-ups with safe, effective variations for beginners.
🎥 For a quick visual guide to beginner pull-up technique, including hangs, band assistance, and inverted rows:
👉 Watch PULL-UPS FOR BEGINNERS | 5 Easy Tips to Perform YOUR FIRST PULLUP! – This video breaks down essential progressions and shows how to build strength safely from zero to your first full pull-up.
Tips for Sticking to Your Calisthenics Plan
- Start Slow: Focus on mastering form before increasing reps or intensity.
- Track Progress: Keep a journal to note your reps, sets, and improvements.
- Be Consistent: Aim for 2-4 workouts per week.
🧭 Want more beginner-friendly calisthenics guidance? Whether you’re training in a small space or looking for real-life motivation, these companion guides will help you take the next step:
- 🏠 Calisthenics for Beginners at Home — Discover 10 proven moves you can do right in your living room. No gym, no gear—just real progress.
- 🔓 Unlock Secrets of Calisthenics for Beginners: Unleash Your Potential — Follow Sarah’s inspiring journey from stuck to strong and learn how bodyweight training builds lasting strength, mobility, and confidence.
🧠 Want More Beginner-Friendly Calisthenics Guidance?
If you’re looking to expand your routine or dive deeper into beginner calisthenics, these trusted resources offer clear tutorials, sample workouts, and expert tips:
- ✅ Beginner Calisthenics Tips from Gymshark — A practical guide with 8 starter exercises and progression advice.
- ✅ Complete Beginner Calisthenics Guide from BetterMe — Includes sample routines and tips for building strength safely.
- ✅ Sample Calisthenics Routines and Tips from wikiHow — Step-by-step instructions with illustrations and modifications.
Conclusion
Starting your calisthenics journey might seem overwhelming at first, but by following these 10 incredible steps, you’ll set yourself up for lasting success. Calisthenics isn’t just about building strength — it’s about mastering control over your own body, improving your mobility, and boosting your overall confidence. Remember, progress takes time, so be patient, stay consistent, and celebrate every small victory along the way.
The beauty of calisthenics is that anyone can start, no matter their fitness level — and with dedication, you’ll be amazed at what your body can achieve. So lace up, find a spot to move, and begin your journey today. Your strongest self is waiting!
Want to learn more about bodyweight training? Check out The Ultimate Calisthenics FAQ: Everything You Need to Know About Bodyweight Training for a complete guide to calisthenics, including exercises, tips, and expert advice to help you get stronger and move better.
🔥 Gear to Help You Achieve Your Health and Fitness Goals 💪
If you’re looking for tools to enhance your fitness journey, check out this. Explore top-rated fitness gear on Amazon to enhance your workouts. Check out the latest picks here! 🛒 to support your workouts and progress.
🚀 Find equipment designed to boost strength, endurance, and overall performance!
⚠️ Short disclaimer: As an Amazon Associate, I earn from qualifying purchases.
People Also Ask
What is low-impact calisthenics?
- Gentle bodyweight exercises that avoid joint strain
- Focuses on strength, flexibility, and endurance
How does low-impact calisthenics benefit beginners?
- Reduces injury risk
- Builds strength and mobility safely
- Improves balance and coordination
Can low-impact calisthenics build strength?
- Yes, through controlled bodyweight movements
- Gradually increases muscle endurance and power
Are low-impact calisthenics good for joint pain?
- Yes, they minimize stress on joints
- Help improve joint mobility and reduce discomfort
What equipment is needed for low-impact calisthenics?
- None required; uses only your bodyweight
- Optional: a mat or chair for support
How often should beginners do low-impact calisthenics?
- 3 to 4 times per week
- Allow rest days for recovery
Cast your burden on the Lord and he will sustain you. He will never allow the righteous to be moved. – Psalm 55:22

